Introduction: When Every Surface Turns Into the Same Shine
You ask for a 2D anime workshop scene: a linen apron, enamel pins, a cracked ceramic mug, brushed steel scissors, wet concrete, and a velvet curtain. The draft has all the objects, but they share the same glossy highlight. Cloth looks like plastic, metal looks like glass, and the mug has no weight.
Material and texture vocabulary gives each object a visual rule. Cotton absorbs light. Satin catches a smooth directional sheen. Brushed metal shows thin linear highlights. Wet asphalt reflects broken color in puddles. Cold glass creates hard edges and transparency. Rough ceramic has tiny uneven shadows. These words are useful only when they are tied to objects, lighting, and camera distance.
This guide explains how to use material and texture terms without turning the prompt into a dictionary dump. It covers clothing, props, rooms, weathered surfaces, contrast, keeping a material rule attached to an ArcLoop asset, and three copy-ready examples. Use Style Pack Templates, Cyber Neon Rainlight, and ArcLoop Worlds when a material rule needs to carry across shots.
The goal is surface distinction: the viewer should understand what is soft, hard, wet, worn, polished, dusty, heavy, or fragile.
Core Principles for Material and Texture Prompts
Attach every texture word to a noun. "Cotton, satin, metal, glass, rough, wet" floating at the end often gets smeared across the whole scene. Write "matte cotton apron," "pale satin ribbon," "brushed steel scissors," and "wet concrete floor."
Describe light behavior, not only surface names. Matte wool softens highlights, patent leather has sharp reflections, brushed metal creates directional streaks, and frosted glass diffuses shapes behind it.
Limit hero textures. A short shot can usually handle two or three important surfaces. If you ask for ten detailed materials, the output may flatten them into one generic style. Choose the textures that tell the story or help the focal object read.
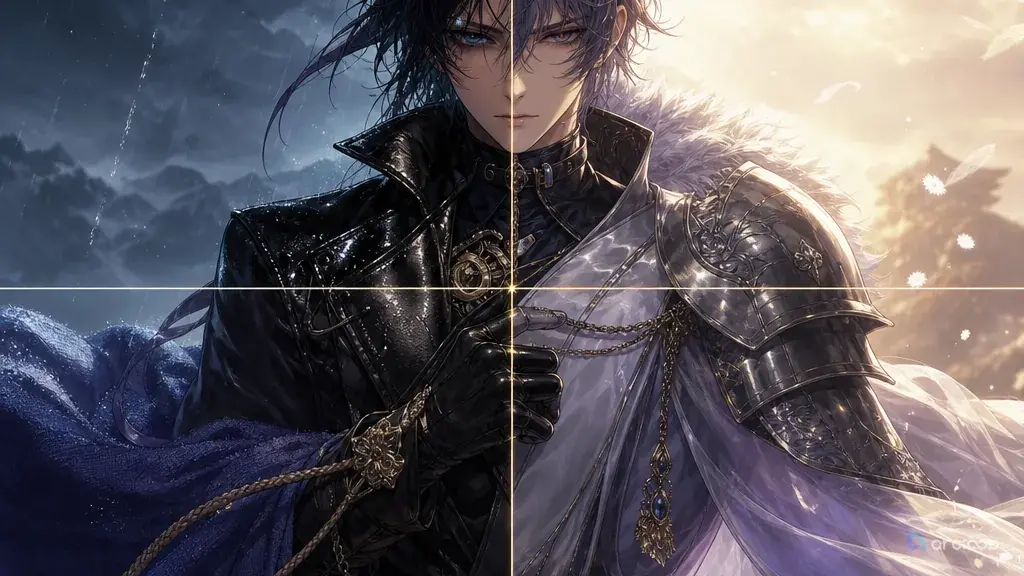
Use contrast deliberately. Soft cotton beside hard enamel, dry paper beside wet tile, or matte clay beside polished brass gives the frame tactile variety.
Respect animation stress. Tiny embroidery, complex lace, chains, sequins, and dense patterns can drift in motion. For moving characters, use broader cues: heavy canvas folds, satin sheen, rubber soles, scuffed leather.
Keep materials consistent across assets. If a prop's asset says brass, don't let a later shot turn it into gold plastic — the fix is to describe the material inside the prop asset itself, in My Assets, so every shot that references it with @ inherits the same surface instead of redefining it each time.
Step-by-Step Material Prompt Method
Start with the focal object: raincoat, cracked cup, sword hilt, stage floor, old book, school bag, or vending machine glass. Put the strongest texture detail there.
List supporting surfaces by role. Clothing supports identity, props support action, and background surfaces support world mood. Do not give equal detail to everything.
Choose words that imply behavior. Clothing terms include matte cotton, ribbed knit, heavy canvas, satin ribbon, worn denim, waxed raincoat, scuffed leather, translucent chiffon, and rubber sole. Prop terms include chipped ceramic, polished brass, brushed steel, cloudy glass, enamel paint, carved wood, paper fiber, and oxidized copper.
Add lighting interaction: satin ribbon catches a narrow window highlight, wet asphalt reflects broken red sign light, ceramic stays mostly matte except for a small rim highlight. Match detail to camera distance. Close-ups can show scratches and weave; wide shots need broad categories like matte, glossy, wet, dry, heavy, or light.
Add constraints only for likely drift: no plastic shine on cloth, no mirror reflections on matte fabric, no metallic skin, no glassy hair, no random material swap. Then review by category and repair only the weak surface.
Put Texture Rules on the Asset, Not the Prompt
Texture rules often belong to assets, not one prompt. A waxed yellow raincoat should stay waxed in every rainy shot. A tea shop's chipped blue ceramic cups should not turn into polished porcelain in episode two.
Store rules where they will be reused. Character sheets include clothing materials, prop boards include surface and wear notes, style packs define broad rendering behavior, and shot cards explain lighting interaction for the current scene. If a material identifies the IP, promote it to the asset library.
Keep the review pass narrow. If the draft has the right character and camera but cloth looks plastic, keep identity, action, and lighting; change only cloth texture, prop finish, and ground reflection. Start from Style Pack Templates, then add object-specific vocabulary inside ArcLoop Worlds.
Example Prompt 1: Tailor Shop Texture Board
Create a character asset in ArcLoop for an original 2D anime tailor named Vessa. She has short navy hair, warm gray eyes, a charcoal cotton apron, a pale satin measuring ribbon around her neck, brass scissors, and a chipped ceramic pin bowl. Setting: a tiny second-floor tailor shop above a bakery, late morning window light, bolts of fabric stacked on wooden shelves.

Material focus: make each surface behave differently. The charcoal apron is matte cotton with soft folds and no shine. The satin measuring ribbon catches a narrow smooth highlight along its curved edge. The brass scissors are polished at the finger holes but scratched along the blades. The ceramic pin bowl is off-white with chipped blue glaze on the rim. The wooden shelves are dry, honey-colored, and slightly worn at the corners. Fabric bolts show broad color blocks, not tiny unreadable patterns.

Output: one clean reference board with Vessa front view, apron close-up, ribbon close-up, scissors, pin bowl, and shelf material samples. Style: clean cel-shaded anime with painted background texture. No plastic shine on cloth, no mirror reflection on ceramic, no fake text labels, no logos, no photorealism, no copied symbols.
This prompt builds material contrast before animation.
Example Prompt 2: Rain Market Surface Shot
Generate a 7-second 2D anime street-market shot featuring an original courier named Juno. She has cropped black hair, a clear vinyl rain hood, a red canvas delivery vest, dark rubber boots, and a brushed aluminum lunch case. Setting: a narrow fish market after closing, blue tarps overhead, wet asphalt, stacked foam crates, and a single warm noodle stall in the background. Camera: knees-up tracking shot from the side, slow movement, Juno remains centered.

Main action: Juno steps around a puddle, tightens her grip on the aluminum lunch case, and looks toward the noodle stall light. Texture rules: the vinyl hood is translucent with hard raindrop highlights; the red canvas vest is matte and slightly darkened by water at the shoulders; the rubber boots have dull black highlights and muddy soles; the aluminum lunch case shows soft brushed horizontal streaks; wet asphalt reflects broken blue tarp color and warm stall light, but not a perfect mirror.

Animation details: rain beads slide down the hood, puddle ripples under one boot, the lunch case swings once. Keep Juno's hood, vest, boots, case, and profile consistent. No plastic shine on canvas, no chrome mirror lunch case, no dry asphalt, no readable stall text, no logos, no extra characters in the foreground.
Wet, rubber, canvas, vinyl, and metal do different jobs in the same light.
Example Prompt 3: Ceramic Cup Revision Pass
ArcLoop material revision pass for the selected take. Keep the approved character, tea room, camera, lighting, and action. Character: Marn, an original tea apprentice with sandy blond hair, a forest-green haori, cream linen sleeves, and a small scar on one eyebrow. Setting: quiet mountain tea room with tatami floor, paper screen window, low table, and a black clay teapot. Current issue: the cup, teapot, sleeves, and table all look like glossy plastic.

Create a polished 6-second 2D anime close-up. Main action: Marn places a small cup on the low table and slides it forward with two fingers. Camera: locked close-up on hands, cup, teapot, sleeves, and table edge. Material repair only: the cup is rough beige ceramic with a slightly uneven rim and tiny speckled glaze; the teapot is matte black clay with a soft edge highlight; the linen sleeves are dry cream fabric with visible broad folds and no shine; the table is dark lacquered wood with one controlled soft reflection under the cup. Tatami in the background stays muted and woven.

Keep the same hand pose, scar glimpse, green haori edge, paper window light, and calm tea-room mood. No plastic shine on ceramic or fabric, no metallic teapot, no glass cup, no random pattern, no text, no logo, no camera change.
This revision keeps the shot intact and repairs only the surface behavior that broke the illusion.
Common Mistakes in Material and Texture Prompts
The first mistake is using texture words as a loose list. Attach them to objects.
The second mistake is making every surface glossy. Cloth, paper, clay, rubber, and worn wood usually need muted highlights.
The third mistake is overloading patterns. Plaid, lace, tiny embroidery, and complex decals can drift during animation.
The fourth mistake is ignoring camera distance. Close-ups can show scratches and fiber. Wide shots need bigger categories: matte cloth, wet ground, polished metal, translucent glass. Match detail scale to framing.
The fifth mistake is separating material from light. Brushed steel under soft window light looks different from brushed steel under neon. Always pair important materials with the current lighting condition.
Finally, do not let texture rewrite identity. If the character sheet says canvas vest and rubber boots, a later polish pass should not turn them into leather and chrome because those surfaces look more dramatic.
FAQ: Material and Texture Vocabulary
What material words are most useful for AI anime prompts?
Use words that imply visible behavior: matte cotton, heavy canvas, satin ribbon, scuffed leather, rubber sole, chipped ceramic, brushed steel, polished brass, frosted glass, wet asphalt, carved wood, paper fiber, and oxidized copper.
How many textures should I include in one prompt?
For most short clips, choose one hero texture and two or three supporting surfaces. More than that can dilute the result unless you are building a reference board instead of a moving shot.
How do I stop clothing from looking like plastic?
Attach matte or fabric behavior to the clothing: soft folds, muted highlights, visible weave at close range, water-darkened areas if wet, and no mirror shine.
Should I create separate material references?
Yes, when the material is part of a recurring character, prop, or world. Put the material details in the character, prop, or scene asset itself inside My Assets — clothing texture in the character asset, surface finish in the prop asset — so every later shot that references it with @ inherits the same material instead of guessing again.
When should I run a material revision pass?
Run it when identity, action, camera, and lighting are already close, but surfaces read wrong. Keep the approved layers still and change only cloth behavior, prop finish, ground reflection, glass transparency, or wear marks.