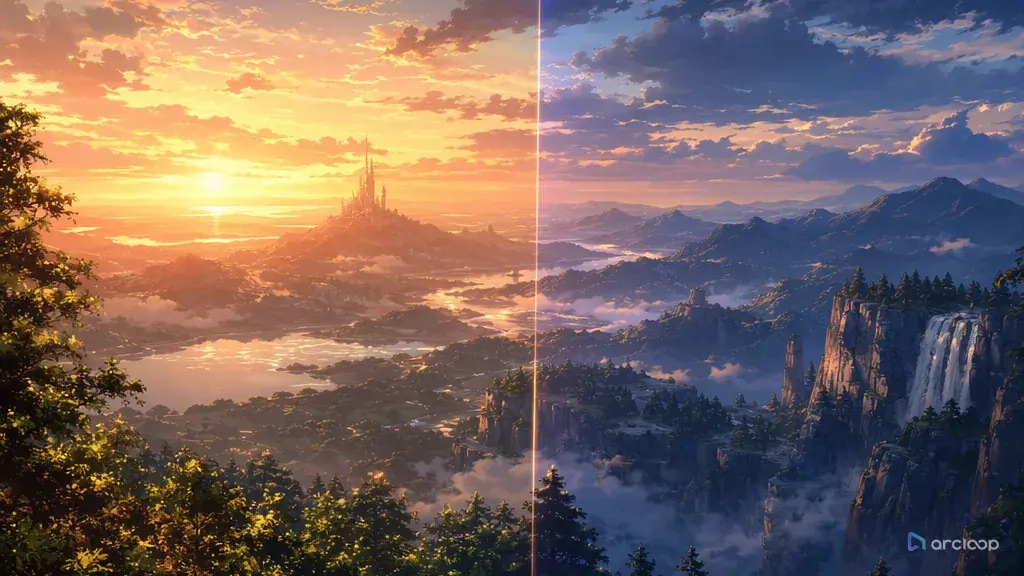
Introduction: Anime Scene Concept Art Should Be a Place You Can Film
The failed version is familiar: you generate a stunning city square, save it, then discover it cannot support the next shot. There is no clear path for the character to walk, no doorway to enter, no midground where a chase can happen, and no landmark that tells the viewer they are still in the same place. It is pretty concept art, but it is not a usable anime scene.
Anime scene concept art is not only a background painting. It is a production map for later animation. A strong scene prompt spells out what sits in the foreground, where the character can move, what landmark anchors the background, how light enters the space, and which world detail must stay visible when the camera changes — so the scene can support movement, not just look good.
Use this guide when you are designing markets, classrooms, rooftops, shrine paths, fantasy ports, underground workshops, train interiors, or any setting that needs more than one shot. Browse Style Pack Templates for visual starting points, then use Cyberpunk Walk Depth Layers when you need a scene that supports character movement through depth.
Core Principles for Anime Scene Concept Art
Build the route first. If a character might enter, cross, hide, chase, wait, or turn, the scene needs a visible path. That path can be a bridge, aisle, stair, wet street, service rail, garden stones, or classroom row. Without it, later shots often feel pasted in front of a poster.
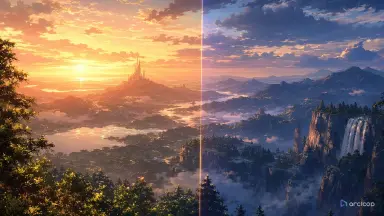
Divide the frame into foreground, midground, and background. The foreground frames the viewer's eye. The midground is where action usually happens. The background landmark keeps the scene recognizable when the camera angle changes.
Choose one light direction. Window light from the left, neon from below, lanterns from the path, sunset behind the tower, or monitor glow from the desk can all work. Mixing five light sources in the concept pass makes later shot matching harder.
Include scale cues. A small figure on a bridge, vending machines under a station roof, stacked crates beside a dock, or desks in a classroom tells the viewer how large the place is. Scale cues also protect anime backgrounds from turning into abstract decoration.
Leave room for characters. A scene concept that fills every inch with detail may look rich, but it can crowd out the acting area. Reserve a clean midground pocket where a character can stand, gesture, or move.
Make the world rule visible through layout. If the city is built around wind turbines, show wind channels. If the school stores memories in lockers, show how the lockers shape the hallway. Setting rules should change the architecture, not sit in a caption.
Step-by-Step Anime Scene Concept Art Prompt Method
Start with the scene's production purpose. Write whether the concept will support a walking shot, reveal shot, dialogue beat, chase, establishing shot, or final emotional frame. The purpose decides the camera distance and how much empty space to keep.
Name the location in concrete terms. "Floating night market" is a vibe. "A floating night market built from docked fishing boats tied around a central lighthouse kitchen" gives structure, paths, and a landmark.
Map the depth. Write one phrase each for foreground, midground, and background. Keep them short: foreground hanging nets, midground curved plank walkway, background lighthouse kitchen and moored boats.
Set character placement. Even for a concept image, say where a future character could stand or move. Use "clear walking lane," "small acting area near the counter," or "empty roof edge for a reveal shot."
Define light and weather as scene tools. Rain, fog, dust, snow, steam, and sunset are useful when they clarify depth or mood. They become harmful when they hide the route or landmark.
Add constraints for later reuse. Ask for no fake text, no unreadable signage, no impossible stairs, no crowd blocking the path, no random perspective shift, and no photorealism if the project is 2D anime. Save the approved scene as a scene asset in My Assets so every later shot in ArcLoop Worlds can pull it in with an @ reference instead of redescribing the space.
Plan Scene Concept Art Inside ArcLoop
ArcLoop lets the scene concept become a scene asset in My Assets instead of a one-off image, sitting alongside the character asset and the storyboard beats it supports. When you generate the next shot, the approved scene asset can answer practical questions: where does the character enter, what landmark stays behind them, and what light direction continues across the cut?
Use a scene card for layout decisions and a shot card for the camera. The scene card should control paths, action zones, landmarks, palette, and world rules. The shot card should control framing, duration, movement, and what the viewer learns in that specific clip.
Review the concept as if you were about to film in it. Can a character cross the frame? Can two characters face each other? Does the landmark stay recognizable from another angle? Is there a clean place for a close-up? If the answer is no, fix the concept before asking for a polished background.
Example prompt 1: Floating Kitchen Market Concept
Create a 2D anime scene concept art board for an original floating kitchen market used in a short series. Location: a ring of small fishing boats tied around a tall lighthouse kitchen, open at blue hour. Foreground: hanging nets, lantern hooks, and a wet wooden railing framing the bottom edge. Midground: a curved plank walkway with enough clear space for one character to walk while carrying a tray. Background: the lighthouse kitchen glowing warm orange, moored boats, and dark water reflecting tiny stove lights. Light direction comes from the lighthouse windows and low lanterns along the walkway. Include one small scale figure in a rain cape near the midground, but keep the scene itself as the focus. Clean cel-shaded anime background style, readable perspective, no fake text, no crowd blocking the path, no photorealism.
This prompt creates a location that can support later walking, dialogue, and reveal shots. The lighthouse kitchen is the repeatable landmark.
Example prompt 2: Memory Locker School Hallway
Generate anime scene concept art for an old school hallway where students store memories in glass lockers after class. Foreground: open locker door with soft blue reflections at the left edge, leaving the center clear. Midground: long polished hallway with a visible walking lane, two classroom doors, and one empty bench where a character can sit. Background: stair landing under a round window, pale afternoon light entering from the right. World rule: each locker contains a small floating object instead of books, but keep the objects simple and not text-based. Palette: faded cream walls, blue glass, warm floor reflections. The layout should be usable for a quiet dialogue scene and a later running shot. No readable labels, no warped perspective, no dense crowd, no horror lighting, no 3D render.
The prompt makes the setting rule affect the architecture and props. It also protects a clean lane for animation.
Example prompt 3: Wind-Bridge Village Revision
Revise the selected scene concept for an original wind-bridge village built across a mountain gap. Preserve the approved idea: narrow bridges, cloth wind vanes, terraced houses, and a distant repair tower. Current problem: the last version looked beautiful but had no clear route for a character to cross. Create a cleaner anime concept frame with a foreground rope railing, a midground bridge path wide enough for two people, and the repair tower as the background landmark. Light direction: late morning sun from upper left, bright but not washed out. Add wind movement through cloth vanes and laundry lines, not through camera blur. Leave an empty acting area near the center-right for a later scene. No fake text, no impossible bridge geometry, no crowd covering the path, no photorealism.
This revision keeps the world and changes only the layout failure. That is cheaper than rebuilding the whole setting.
Common Mistakes in Anime Scene Concept Art
The most common mistake is making a postcard instead of a filmable location. A postcard can be symmetrical and packed with detail. A scene concept needs routes, action pockets, scale, and camera options.
Another mistake is hiding the midground. If the entire image is foreground decoration and distant skyline, there is nowhere for characters to act. Reserve a readable middle layer.
Creators also overuse signs and text to explain the world. Generated text can become messy, and it does not help animation. Use shape, architecture, lighting, and repeated objects to show the rule.
A fourth mistake is changing the light rule in every new shot. Once the concept says lantern light from below or window light from the right, keep that rule unless the story time changes.
Finally, do not approve a scene before testing a character placement. Drop in a small figure or silhouette. If the scene swallows the character, simplify the layout before final polish.
FAQ
How detailed should an anime scene concept art prompt be?
Include the location purpose, foreground, midground, background landmark, light direction, scale cue, and one world rule. Extra decoration can wait until the layout works.
Should I include characters in scene concept art?
Use a small scale figure or silhouette when it helps judge size and walking space. Keep the scene as the main asset unless you are making a specific shot.
How do I make a concept art location usable for animation?
Give it a route, an action area, a landmark, and a clear light rule. Bind it as a scene asset, then test it in one shot card under Storyboard before polishing the background.
What if the scene is beautiful but the next shot does not match?
Check whether the approved scene card contains reusable layout rules. If it only says mood and style, add practical anchors: entrance, landmark, path, light source, and camera-safe acting area.
How do I turn a scene concept into a repeatable anime world?
Save the scene as a scene asset in My Assets, alongside the character assets it appears with. Reference both with @ in each shot card under Storyboard, so every new clip reuses the same layout logic instead of inventing a new background.